We will start this course, by making the register page better. Here we will add a button to show/hide the password, generate a random password, and will show the password strength bar.
First, we will create a Livewire component.
php artisan make:livewire RegisterPasswordsNow, we need to move password fields to the newly created component, and instead call our created Livewire component.
resources/views/livewire/register-passwords.blade.php:
<div> <!-- Password --> <div class="mt-4"> <x-input-label for="password" :value="__('Password')" /> <x-text-input id="password" class="block mt-1 w-full" type="password" name="password" required autocomplete="new-password" /> <x-input-error :messages="$errors->get('password')" class="mt-2" /> </div> <!-- Confirm Password --> <div class="mt-4"> <x-input-label for="password_confirmation" :value="__('Confirm Password')" /> <x-text-input id="password_confirmation" class="block mt-1 w-full" type="password" name="password_confirmation" required /> <x-input-error :messages="$errors->get('password_confirmation')" class="mt-2" /> </div></div>resources/views/auth/register.blade.php:
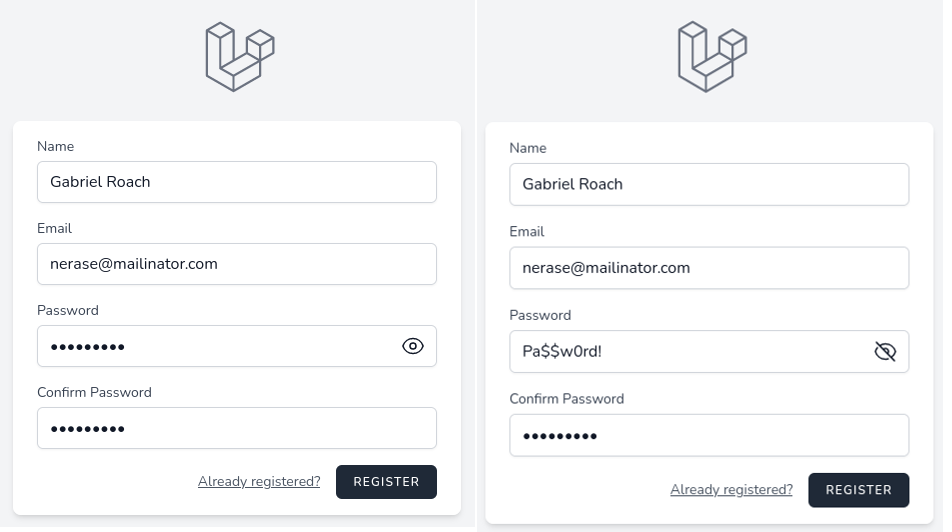
@livewire('register-passwords')First, let's make a password show/hide feature. For this, we only will use Alpine.js, no Livewire needed, as we interact with the browser only, no need to send the data to the server.
If you're new to Alpine.js, you can watch this free 7-minute quick introduction video and it will be enough for you to understand, for the purpose of this tutorial.
resources/views/livewire/register-passwords.blade.php:
<x-text-input id="password" class="block mt-1 w-full" type="password" name="password" required autocomplete="new-password" /> <div class="flex mt-1 mb-2"> <div class="relative flex-1 col-span-4" x-data="{ show: true }"> <input class="w-full rounded-md border-gray-300 shadow-sm focus:border-indigo-300 focus:ring focus:ring-indigo-200 focus:ring-opacity-50" id="password" :type="show ? 'password' : 'text'" name="password" required autocomplete="new-password" /> <button type="button" class="flex absolute inset-y-0 right-0 items-center pr-3" @click="show = !show" :class="{'hidden': !show, 'block': show }"> <!-- Heroicon name: eye --> <svg xmlns="http://www.w3.org/2000/svg" fill="none" viewBox="0 0 24 24" stroke-width="1.5" stroke="currentColor" class="w-6 h-6"> <path stroke-linecap="round" stroke-linejoin="round" d="M2.036 12.322a1.012 1.012 0 010-.639C3.423 7.51 7.36 4.5 12 4.5c4.638 0 8.573 3.007 9.963 7.178.07.207.07.431 0 .639C20.577 16.49 16.64 19.5 12 19.5c-4.638 0-8.573-3.007-9.963-7.178z" /> <path stroke-linecap="round" stroke-linejoin="round" d="M15 12a3 3 0 11-6 0 3 3 0 016 0z" /> </svg> </button> <button type="button" class="flex absolute inset-y-0 right-0 items-center pr-3" @click="show = !show" :class="{'block': !show, 'hidden': show }"> <!-- Heroicon name: eye-slash --> <svg xmlns="http://www.w3.org/2000/svg" fill="none" viewBox="0 0 24 24" stroke-width="1.5" stroke="currentColor" class="w-6 h-6"> <path stroke-linecap="round" stroke-linejoin="round" d="M3.98 8.223A10.477 10.477 0 001.934 12C3.226 16.338 7.244 19.5 12 19.5c.993 0 1.953-.138 2.863-.395M6.228 6.228A10.45 10.45 0 0112 4.5c4.756 0 8.773 3.162 10.065 7.498a10.523 10.523 0 01-4.293 5.774M6.228 6.228L3 3m3.228 3.228l3.65 3.65m7.894 7.894L21 21m-3.228-3.228l-3.65-3.65m0 0a3 3 0 10-4.243-4.243m4.242 4.242L9.88 9.88" /> </svg> </button> </div></div> Here are a few things to explain.
Everything in Alpine starts with the x-data directive, so we add reactive data called show and by default, we set it to true. Next, for the input, we bind the type attribute to change its type to password or text.
We have two buttons for which we use heroicons to show icons. For those buttons, we use the shorthand syntax @click to change the show status. And the last thing for buttons: we bind class to change whether show them or not.
Now, let's add a button to generate a random password. For this, we need two public properties on the Livewire component, to bind both password fields.
app/Livewire/RegisterPasswords.php:
class RegisterPasswords extends Component{ public string $password = ''; public string $passwordConfirmation = ''; }resources/views/livewire/register-passwords.blade.php:
<input class="w-full rounded-md border-gray-300 shadow-sm focus:border-indigo-300 focus:ring focus:ring-indigo-200 focus:ring-opacity-50" id="password" :type="show ? 'password' : 'text'" name="password" wire:model="password" required autocomplete="new-password" /> <x-text-input id="password_confirmation" class="block mt-1 w-full" type="password" wire:model="passwordConfirmation" name="password_confirmation" required />Next, let's add the Generate button itself.
resources/views/livewire/register-passwords.blade.php:
<div class="flex mt-1 mb-2"> <div class="relative flex-1 col-span-4" x-data="{ show: true }"> ... </div> <div class="flex items-center place-content-end ml-1"> <x-primary-button wire:click="generatePassword" type="button">Generate</x-primary-button> </div> </div>
This new button has a Livewire action called generatePassword.
app/Livewire/RegisterPasswords.php:
use Illuminate\Support\Str; class RegisterPasswords extends Component{ public string $password = ''; public string $passwordConfirmation = ''; public function generatePassword(): void { $password = Str::password(12); $this->setPasswords($password); } protected function setPasswords($value): void { $this->password = $value; $this->passwordConfirmation = $value; $this->updatedPassword($value); } public function render() { return view('livewire.register-passwords'); }}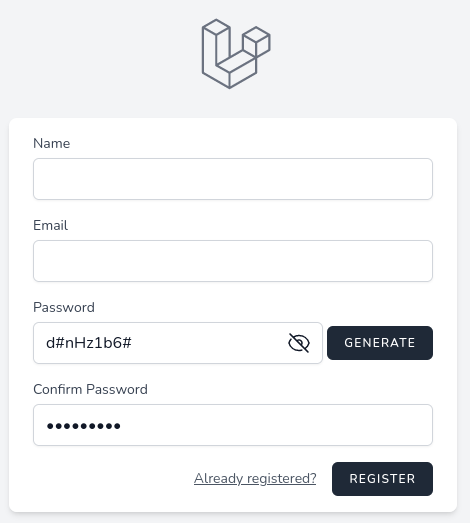
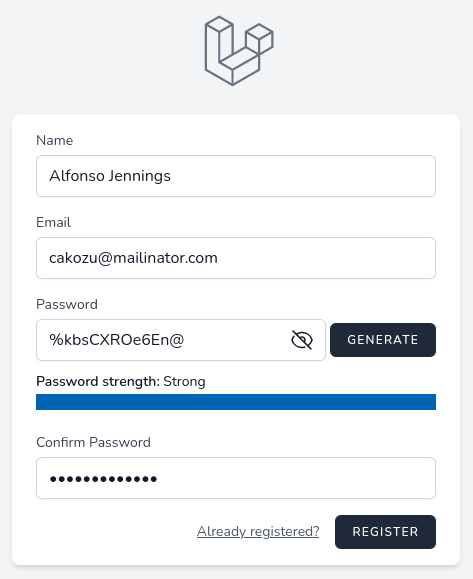
The last feature we will add to the registration form is to show password strength. To determine strength we will use bjeavons/zxcvbn-php package.
composer require bjeavons/zxcvbn-phpTo update the strength value we will use Livewire Lifecycle Hook and will set the $strengthScore public property. Also, we need to update the strength score when generating passwords.
app/Http/Livewire/RegisterPasswords.php:
use ZxcvbnPhp\Zxcvbn; class RegisterPasswords extends Component{ public string $password = ''; public string $passwordConfirmation = ''; public int $strengthScore = 0; public function updatedPassword($value) { $this->strengthScore = (new Zxcvbn())->passwordStrength($value)['score']; } // ... protected function setPasswords($value): void { $this->password = $value; $this->passwordConfirmation = $value; $this->updatedPassword($value); }Now we can show the strength value in the blade file. Besides the progress bar, we will write in words what's the password strength, for example, "weak" or "strong".
Because we only have an integer value of the score, we will add a public property as array of which score value corresponds to which strength in words.
app/Http/Livewire/RegisterPasswords.php:
class RegisterPasswords extends Component{ public string $password = ''; public string $passwordConfirmation = ''; public int $strengthScore = 0; public array $strengthLevels = [ 1 => 'Weak', 2 => 'Fair', 3 => 'Good', 4 => 'Strong', ]; // ...And just before password validation, let's show the strength:
resources/views/livewire/register-passwords.blade.php:
</div> <span class="text-sm"> <span class="font-semibold">Password strength:</span> {{ $strengthLevels[$strengthScore] ?? 'Weak' }} </span> <progress value="{{ $strengthScore }}" max="4" class="w-full"></progress> <x-input-error :messages="$errors->get('password')" class="mt-2" /></div>
And that's it for this part, now we enhanced the registration form.